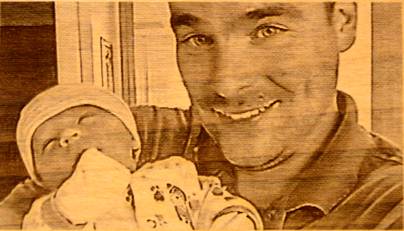
Epilog - Corel Draw Settings for Photo Engraving on Wood

- Open your photo in CorelDRAW, then resize and crop it to the final size you want to engrave.
- Note: In the final step of this process, it’s very important not to change the size of your photo once you convert it to a black-and-white 1-bit photo.
- With your photo imported
and selected in CorelDRAW, open the Resampling Palette
by selecting Bitmaps/Resample from the drop-down menu.
- In the Resample Palette,
change the DPI to 600, and
then click OK.
- Gamma Adjustment Filter: The Gamma filter
allows you to reveal
detail in the low-contrasting
areas of a photo without significantly affecting the shadows or highlights.
- With the photo still selected, open the Gamma adjustment palette. Select Effects/Adjust/Gamma from the drop-down menu.
- In the Gamma Palette, enter
the value 3.5,
and then click
OK. This will brighten
every value in the photo and bring out detail in the dark or shadowed areas.
- Unsharp Mask Filter: This filter accentuates edge detail and focuses blurred areas in the photo without removing low-frequency areas. Low-frequency areas are areas in a photo with subtle or smooth tonal changes—a good example is a portrait photo.
- Select Bitmaps/Sharpen/Unsharp Mask from the drop-down menu,
to open the Unsharp Mask palette.
- In the Unsharp
Mask palette, enter
these values: Percentage 500, Radius 20, and
Threshold 6, and then click OK.
- Sharpening: The Sharpen filter accentuates the edges of the photo by focusing
on blurred areas and
increasing the contrast between neighboring pixels. The result creates greater
contrasted edges in the photo.
- Open the Sharpening palette by selecting
Bitmaps/Sharpen/Sharpen from the drop-down menu.
- In the Sharpen filter palette enter these values,
Edge Level (%) 100, check the box for Preserve
Colors, and Threshold 70, and then click OK.
- Open
the Convert to 1 Bit palette by selecting Bitmaps/Mode/Black and White (1‐bit)
from the drop-down menu.
- With the Black and White palette
open, select Halftone for
the Conversion Method, select
Line as the
- Screen type, enter 0 degrees, and 100 lines per inch, and then click OK.
- The only thing left is to print to your Epilog Laser system.
Related Articles
17000 (Maker Edge Pro) - CO2 Laser Alignment
Introduction In this article we’ll walk you through aligning the laser on the Epilog Fusion Edge & Fusion Pro. During this procedure, all persons present in the room must be equipped with eye protection, such as safety glasses, eyeglasses or goggles. ...
Epilog - CorelDraw Epilog Not Displaying in Driver Compatibility
If Epilog Engraver is not displayed as a printer in the Driver Compatibility Menu, Go to: C Drive > Users > [Current User] (Show Hidden Files) > App Data > Roaming > Corel > Corel Draw Graphics Suite [Version]> Config > Corelprn Scroll Down to ...
Epilog - Vector Lines are Not Being Spilt by The Dashboard
1. Ensure vector line weights are set properly: Hairline - Corel Draw .001 - Adobe Illustrator 2. Epilog Dashboard Settings May Not Be Configured Properly: Open the Epilog Dashboard Click the settings gear In the upper right-hand corner. Navigate to ...
Epilog - Zing 24 Laser Alignment
CO2 laser alignment should be checked periodically to ensure the engraver is performing optimally. Download the Attached PDF for Detailed Instructions. Complete this procedure if any of the following behaviors are observed: Laser power appears weak ...
Epilog - Zing 16 Laser Alignment
CO2 laser alignment should be checked periodically to ensure the engraver is performing optimally. Download the Attached PDF for Detailed Instructions. Complete this procedure if any of the following behaviors are observed: Laser power appears weak ...